Clearing off the old clear and paint from the overlay.

And here we're all cleaned up and flattened thanks to a couple of warmed pizza stones.

Finally got the bog boy camera out to show some better detailed images of the headstock fracture. Here you can see the sunken center section. It was pretty well glued in despite not being in the correct place.

Here you can see four fractures if you look closely.

The joint isn't fitting correctly, partially because there is glue pressed into the center of the fracture site. So I dug out some of my old surgical tools to get in there and nip away at the dried goo to try and clear the area. Tee-dee-us.

Well the fun keeps piling higher and deeper. Close inspection of the truss rod area reveals two cracks. Fortunately they are properly aligned and don't appear to be missing any pieces so I think this will be the first gluing of the project.


And in the good news category today I received new tools from Amedika! Two for fret work, a specialized truss rod wrench (which I don't need at the moment since the headstock is OFF the guitar) and a little light reading.

Glue going in! I made sure the cracks were free of debris then used Titebond II glue applied with a thin guitar string and herded deep into the cracks using compressed air. Clamped and now waiting to dry.

More picking and tweezing, getting the joint tighter and tighter.


Finally some progress! The shop is set up and things can now move along getting the headless Les Paul, um.... no so headless.
Final fitting of the pieces before putting her in the MacGuyver clamp with a bit of Titebond.
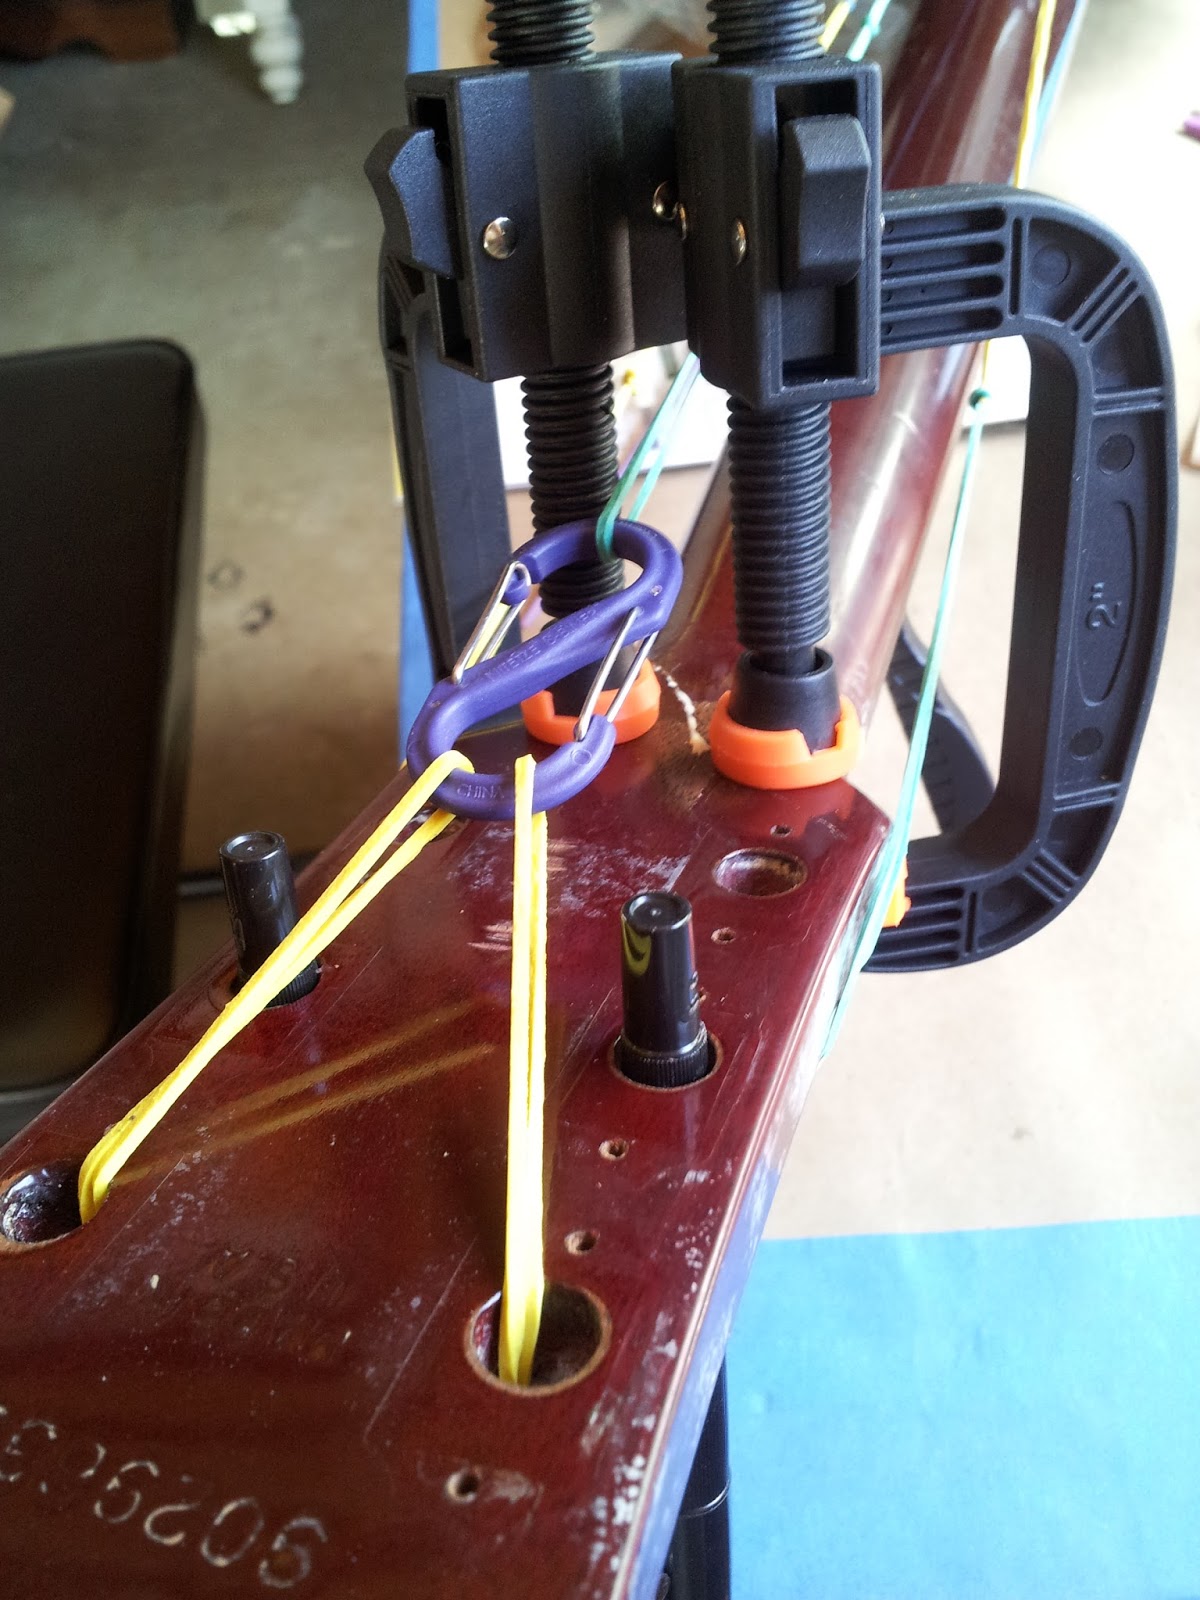
So here's what you're seeing below: The two C-clamps are holding the head stock in place front-to-back. I have inserted two felt markers into the machine holes to give my rubber bands a leverage spot to help pull the head stock down into the fracture site from both the front and back of the neck. The yellow rubber bands are connected to an S-biner to equally distribute the pressure. There was also an oh-so-gentle tap or three with a hammer to get everything seated.
UPDATE: So lots of stuff happening to this one lately. Decals and veneer arrived! Crox Guitars of England sent over two excellent quality decals to replace the ones damaged when removing the head stock.
And the veneers arrived. The fiber overlay was 1/16 of an inch so I wanted to replicate that for a proper fit of the tuners. I selected three different veneers and decided to make my own plywood.
And now to wait for a couple of days for everything to firm up then to start trimming away the excess.
Obligatory couple of days have passed, on to filing/sanding/etc. the overlay.


Bro, you are a hero... and how is the end of the journey? Does this Les Paul get its pride back?
ReplyDelete